If you’ve googled how to electric grill sear steak or tried to get grill marks on electric grill plates, you’ve probably hit the same wall: pale meat, weak stripes, and a wet surface that never really crusts.
Electric grills can cook food through, but they’re stingier with high heat. That means you have to be more intentional, not more complicated.
This guide gives you a simple, repeatable formula for Maillard browning (that deep, savory crust) plus clean grill marks, without flames, without smoke drama, and without guessing.
RELATED: The 7 Best Electric Grills for 2026, Tested and Reviewed
Get start with electric grill sear steak
Most electric grills in the US run on a standard outlet, which usually means about 1500W to 1800W. That’s plenty for weeknight cooking, yet it’s still a different beast than a charcoal bed or a roaring gas burner. With gas and charcoal, you often get extra heat from combustion and airflow. With electric, you mostly get what the element can deliver, and you feel every mistake.
First problem: heat loss on contact. When a cold steak hits the grate, the grate cools fast. If your grill has thin metal bars or lightweight plates, that heat drop is immediate. The result is gray meat with faint stripes, because the surface never stays hot enough long enough.
Second problem: steam. Electric grills often have more enclosed cooking spaces, drip trays, and smooth plates that hold moisture nearby. As meat warms, it releases water. If that water lingers, it turns into steam, and steam blocks browning.
Third problem: heat escape. Every time you lift the lid, you dump heat. On a charcoal grill, you might recover quickly. On an electric grill, recovery takes longer, so your “sear window” shrinks.
You still win, though, if you focus on three controls: stored heat, dry surfaces, and minimal heat loss. For extra context on what actually creates photogenic marks (and why patience matters), see Serious Eats’ guide to perfect grill marks.
Thermal mass and recovery time
Thermal mass is just “how much heat a thing can store.” A heavy cast-iron skillet stays hot when you drop in a cold steak. A thin cookie sheet cools fast. Grill grates work the same way.
If your electric grill has heavier grates or cast-iron plates, you get better recovery and darker marks. If it’s lighter, you can still get there, but you cook smaller batches and preheat longer.
That’s why one steak at a time often beats crowding. Crowding turns your grate into a heat sponge, and the element can’t refill that heat quickly.
The moisture trap
Moisture is the quiet enemy of crust. Before browning can start, surface water has to boil off. That costs time and it steals heat from the grate. Meanwhile, a closed lid and pooled drippings can raise humidity, so your food cooks like it’s in a steamer basket.
The fix is simple, and you’ll use it all day: dry brine, pat dry, don’t overcrowd, and open the lid only when you need to.
Phase 1, prep-to-sear steps that make grill marks possible before you even turn it on
Think of this phase like charging a battery. You’re removing “water weight” from the surface and reducing the chill that robs heat on contact. Do it right and your electric grill suddenly feels more powerful.
Here’s the tight routine that works for steaks, chicken, burgers, and even vegetables:
- Salt early (when you can), then keep the surface exposed to air.
- Dry aggressively right before it hits the grill.
- Take the edge off the cold (so your grate stays hot).
- Trim messy marinades so they don’t burn before you brown.
Quick timing that’s easy to remember:
- 1-inch steak: dry brine 45 minutes to overnight, then rest at room temp 20 to 30 minutes.
- Chicken thighs: dry brine 45 minutes to a few hours, then pat dry hard (chicken holds a lot of surface moisture).
- Portobello mushrooms: salt 15 minutes, then blot, oil lightly, and keep them thick so they don’t collapse.
If you want a second opinion on what “good marks” really require, Chowhound frames it well in this quick read on getting impressive grill marks. Heat and patience are the headline, but prep is what makes the heat count.
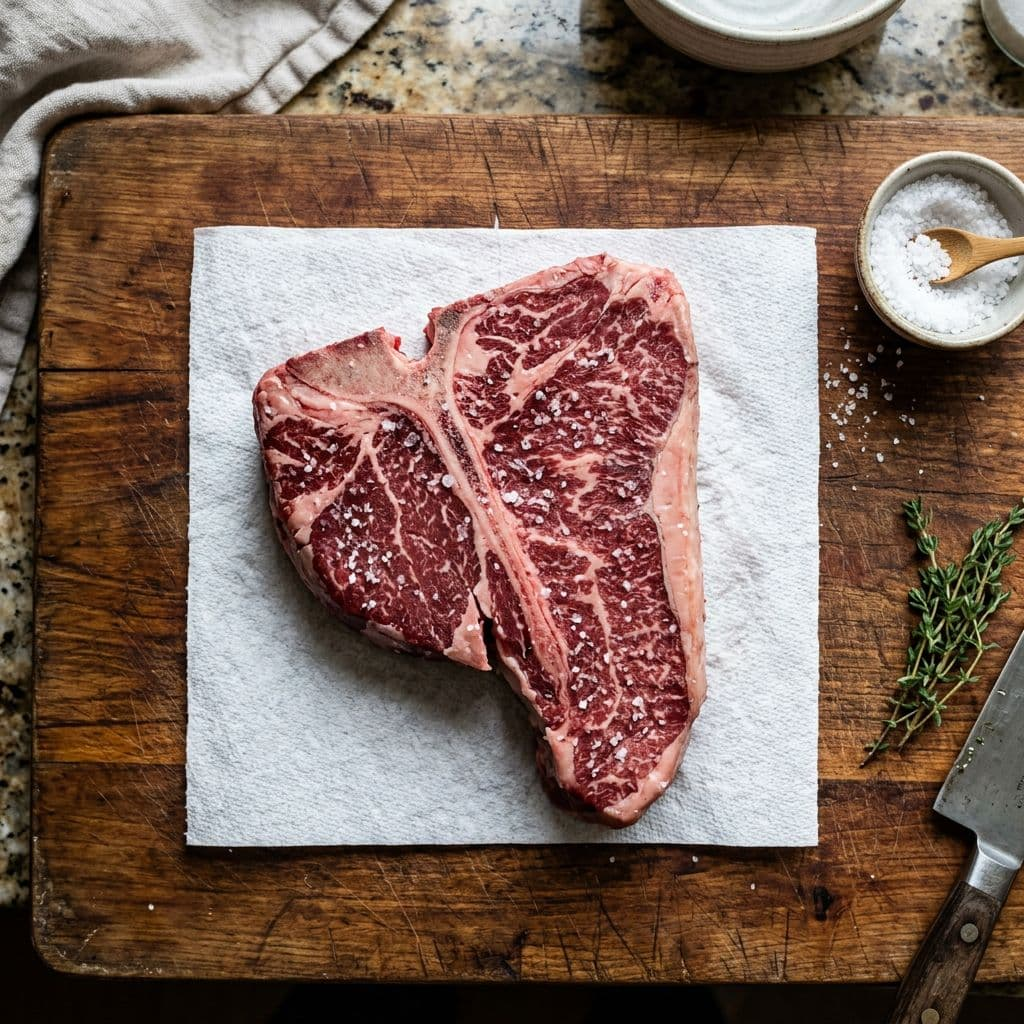
Dry brine for 45 minutes or more
Salt does two useful things. First, it pulls moisture out. Then, given time, that salty liquid gets reabsorbed. The outside ends up drier than where it started, and a drier surface browns faster.
Your simple rule:
- Salt both sides.
- Refrigerate uncovered if you can (a plate is fine).
- Pat dry again right before grilling.
For burgers, salt right before cooking unless you want a firmer texture. For steaks and chicken, the longer window helps.
Pat it dry like you mean it
If the surface looks shiny, it’s still wet. If you see beads, it’s definitely wet. Keep blotting until it looks matte. You’re not being fussy, you’re removing the exact thing that blocks crust.
Marinated foods need one extra move: wipe off the excess. Thick marinades can scorch before you ever get browning, especially on electric grills where preheat time is long.
Phase 2, heat management on an electric grill so you get a real crust
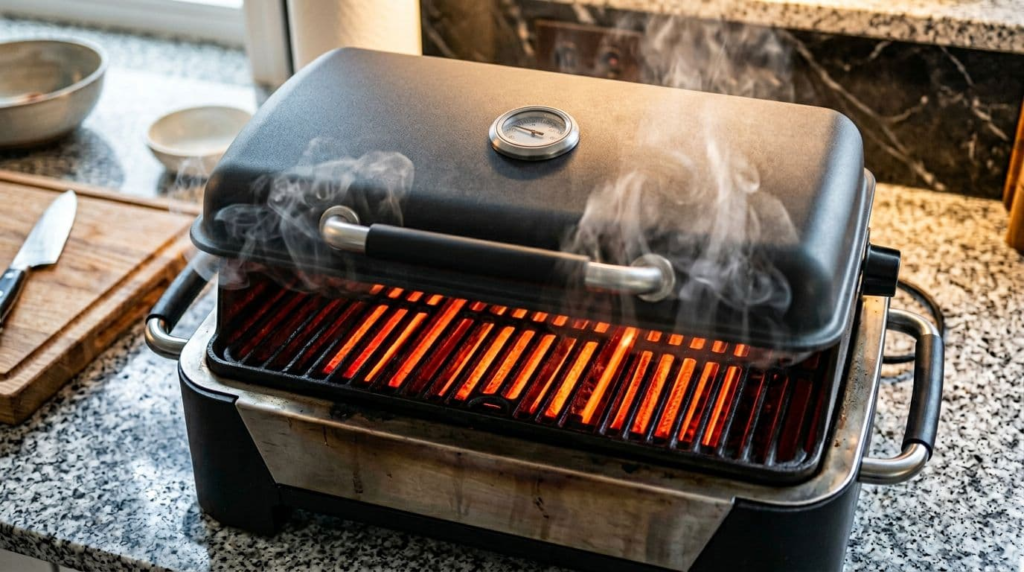
Electric grills reward you for one thing: patience up front. If you rush preheat, you’ll spend the whole cook trying to “fix” color that never arrives. Start with maximum heat, build stored heat, then keep that heat from escaping.
Set the grill to its highest sear setting (or just High), close the lid, and preheat longer than your instincts want. Many models top out lower than gas grills, so you need time to “charge” the grates.
Next, treat the grate like a tool that needs basic care. A dirty grate causes sticking and uneven marks, and electric grills can be extra sensitive because they don’t have a giant heat reserve to burn crud off instantly. Clean your grates when they’re warm, not blazing hot. Then, after the grill cools, wipe plates and drip trays so old grease doesn’t smoke and add steam next time.
One more practical safety note: avoid aerosol cooking sprays if your manual warns against them. Some sprays can damage nonstick coatings and they can flare on very hot surfaces. Use a high-heat oil on a paper towel instead.
For a deeper explanation of why “hot and clean” matters, this America’s Test Kitchen piece on getting awesome grill marks is a solid reality check: marks look great, but your crust comes from consistent contact and heat.
The 15 to 20 minute preheat rule
The ready light is helpful, but it’s not the finish line.
Your electric grill’s indicator says the air is warm, not that the grates have stored enough heat to sear.
Give it 15 to 20 minutes at max heat with the lid closed. If your grill is small and heavy (cast iron, thick plates), you might need less. If it’s larger or lighter, you might need the full time.
Best test: use an IR thermometer if you have one and aim for roughly 375 to 450°F at the cooking surface, depending on the food and your grill. No IR thermometer? Hover your hand carefully above the grate. If you can’t hold it there for more than a second or two, you’re in the right zone.
Lid strategy and spacing
Close the lid during preheat and between flips, because that helps recovery. Still, don’t create a sauna. If you crowd the grill, moisture gets trapped between pieces and marks blur.
A simple spacing rule works almost everywhere: leave at least 1 inch between pieces. If that means cooking in batches, do it. You’ll get better color and more even doneness.
Also, use oil the smart way. Lightly oil the food (not the grill) for most electric setups. It reduces sticking and improves contact. Too much oil can drip, smoke, and make cleanup harder, which matters if you’re trying to keep plates clean for the next cook.
If sticking keeps sabotaging your marks, this quick Serious Eats explainer on preventing food from sticking to the grill pairs perfectly with electric grill cooking, because it’s really about clean grates, proper heat, and letting the crust form.
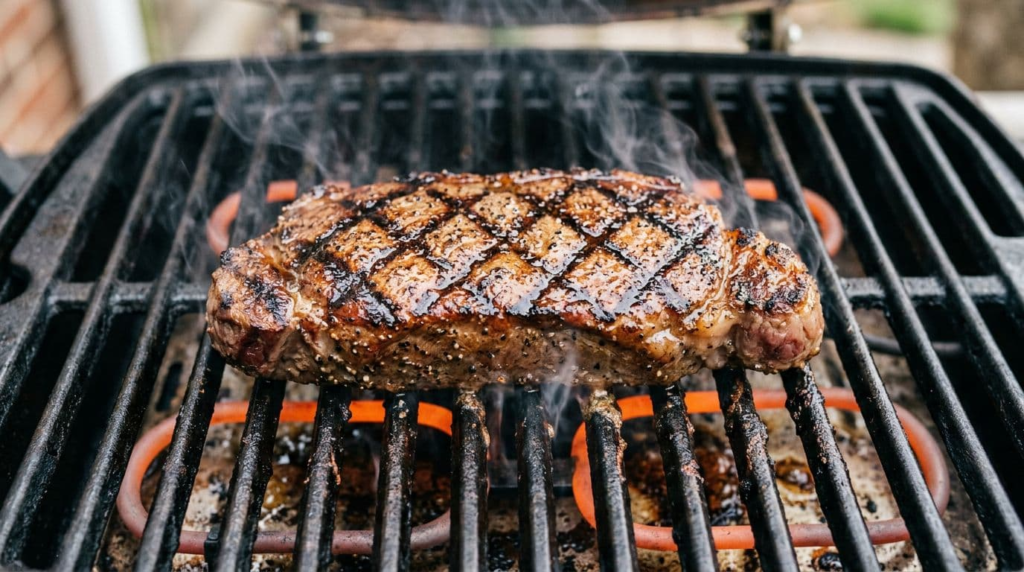
Phase 3, the 10 and 2 technique for crisp diamond grill marks every time
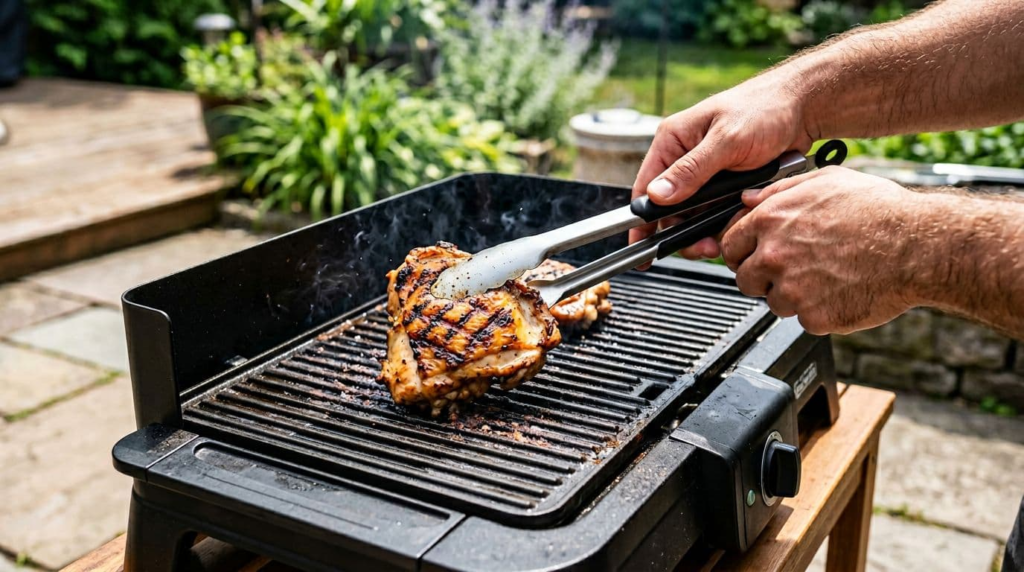
Once prep and heat are handled, grill marks become a timing pattern, not a guessing game. The “10 and 2” technique is just a clean way to repeat the same angles every time.
Your job is to do less. Put the food down, make full contact, then stop fiddling. Electric grills punish constant movement because the grate never gets a calm moment to brown the surface.
Also, accept that time depends on thickness and heat. Use the clock for structure, then use your eyes and a thermometer for accuracy.
First contact at 10 o’clock
Here’s the repeatable sequence:
- Place the food at a 45-degree angle (think 10 o’clock).
- Press lightly for full contact (don’t smash burgers).
- Wait about 2 minutes for steaks and burgers, or 3 to 4 for chicken and thicker vegetables, then rotate 90 degrees (toward 2 o’clock).
- Wait the same time again, then flip and repeat on side two.
For vegetables, thickness is the cheat code. Cut zucchini into long planks, not thin coins. Keep asparagus in bundles. For mushrooms, choose big caps and don’t drown them in oil.
Want a quick visual explanation of why the angle matters? The Manual breaks it down well in this guide to perfect grill marks, especially the idea that marks are mostly about contact, not magic.
The release rule
Sticking is usually a signal, not a failure. If the crust hasn’t formed, the proteins still cling to the grate. Give it another 30 to 60 seconds, then try again.
If it won’t release with a gentle lift, you’re early. Let the crust finish, then it’ll come up cleaner.
Two common exceptions:
- Sugary sauces: they glue fast and burn faster. Add them late.
- Dirty grates: old residue creates hot spots and sticking.
Use a thin metal spatula for flat plates, and tongs for raised grates. Either way, keep the motion decisive once it releases.
How to Electric Grill Sear Steak FAQs
Do grill marks mean better flavor?
They look great, but the deeper flavor comes from overall browning. Aim for a full crust, not just stripes.
Why does my electric grill make food watery?
You’re seeing steam and trapped moisture. Dry brine, pat dry, leave space, and avoid crowding.
Should you oil the grates or the food?
Oil the food lightly most of the time. It reduces drips, smoke, and cleanup, especially on nonstick plates.
How do you stop sticking without scraping hard?
Preheat longer, clean the grates, and wait for release. Aggressive scraping can damage coatings.
What’s the fastest cleanup habit that helps grill marks next time?
After cooking, let the grill cool to warm, then wipe away grease. Clean plates and drip trays stop old residue from smoking and steaming your next cook.
Conclusion
Getting a real sear on electric is simpler than it sounds: heat + a dry surface + don’t peek. Preheat 15 to 20 minutes, keep food dry, give it space, and use the 10 and 2 rotation for crisp diamonds.
After you pull meat off, rest it 5 to 10 minutes. That keeps juices inside and helps the crust stay crisp. Next cook, change just one variable, like a longer preheat, smaller batch size, or more drying time, and you’ll dial in your perfect electric grill sear fast.