If you’ve been told how to sear steak on electric grill is a lost cause, you’ve been sold the wrong story. Electric grills can sear. They just punish sloppy prep and weak preheats.
Most “electric grill steak” disappointments come from two things: not enough heat, and a wet steak. That combo turns the surface gray and steamy instead of brown and crisp.
In this guide, you’ll learn the “Electric Sear” method for a deep crust and juicy, edge-to-edge pink. It’s simple, repeatable, and it won’t wreck your kitchen with smoke.
RELATED: The 7 Best Electric Grills for 2026, Tested and Reviewed
Why electric grills struggle with crust, and how you beat it
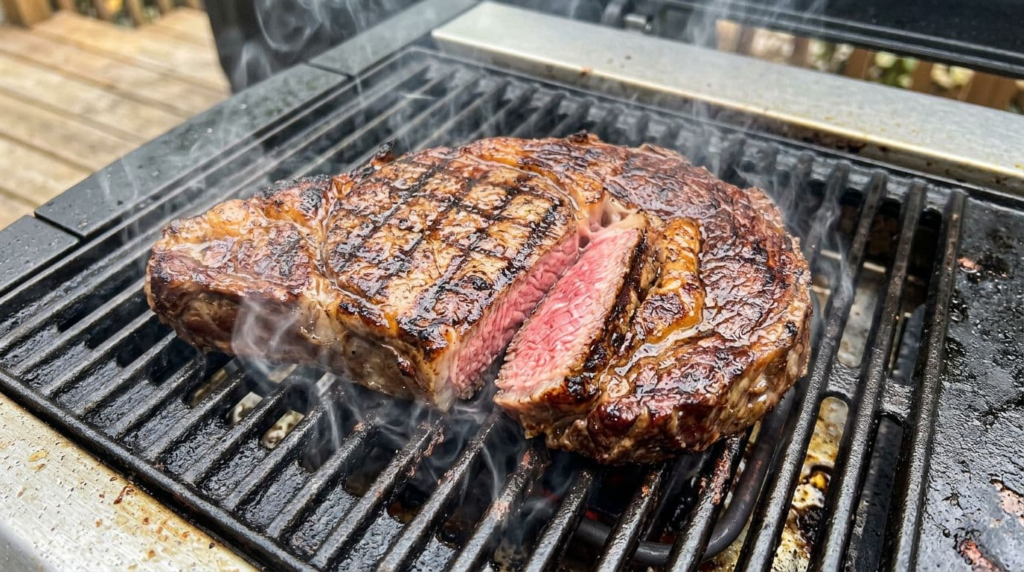
A great sear is mostly chemistry and timing. Browning happens when proteins and sugars react under heat (the Maillard reaction). It starts around 300°F and moves faster at 350°F and up. For steakhouse-style crust, you want very hot contact with the grate.
Here’s the catch. Many electric grills don’t hold peak heat as well as gas or charcoal. They also lose heat fast when you open the lid or drop on cold meat. So your job is to stack the odds: keep the steak surface dry, preheat longer than you think, and sear fast so you don’t overcook the inside.
If you want a quick refresher on how browning and searing works in plain terms, KitchenAid’s guide on searing steak basics maps the idea well, even though it’s written for stovetops.
The “gray steak” problem is usually just moisture
Water is the enemy of crust. If the steak surface is damp, the first heat goes into turning water into steam. Steam blocks browning, so you get that sad gray color.
Quick fixes that work right away:
- Pat the steak dry hard, then do it again.
- Skip wet marinades right before grilling (or wipe them off).
- Don’t crowd the grill, since trapped steam hangs around the meat.
- Don’t salt at the last second if it creates puddles on the surface.
If the steak is wet, you’re not searing, you’re steaming.
The temps that matter, grate heat vs. meat temp
Your grill’s “ready” light only tells you the element has power, not that the grates are hot enough. Electric grills often need a longer preheat, plus time to recover after you add food.
So you’ll cook in two temperature lanes:
- Grate temperature: controls crust.
- Internal meat temperature: controls doneness.
That’s why a thermometer beats guessing minutes, every time.
Set yourself up for success: the right gear and the right steak
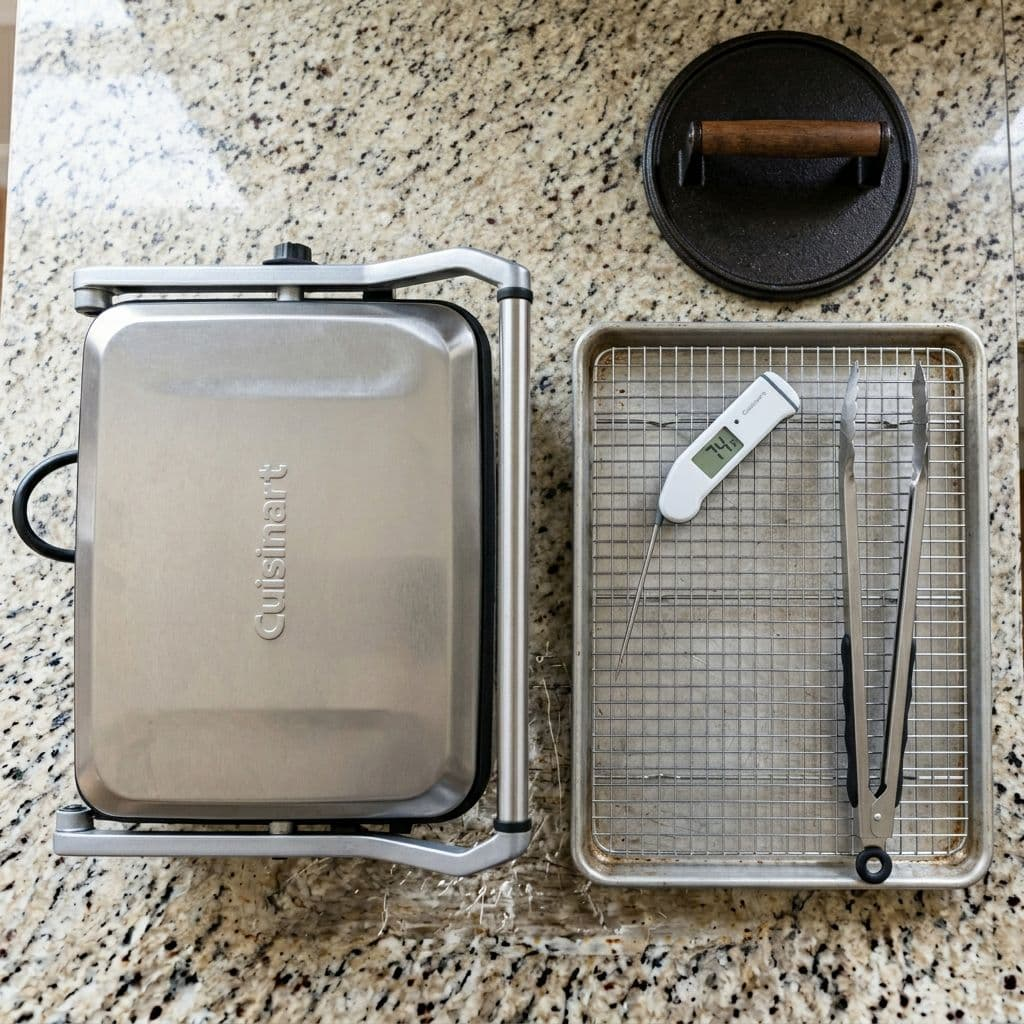
The best way to cook steak on indoor grill setups is the one that removes uncertainty. Electric grills already give you consistency. Add a few tools that protect heat and track doneness, and your results jump fast.
Steak choice matters too. Thin cuts cook through before the outside gets time to brown. Thicker steaks buy you margin.
Aim for:
- 1.25 to 1.75-inch ribeye, strip, or sirloin
- Good marbling if you want more forgiveness
- A flat, even shape so it contacts the grate well
Tools that make electric grilling easier
An instant-read thermometer is non-negotiable. It keeps you from overcooking while you chase crust. Add long tongs so you can manage edges and the fat cap without burning your hands.
A wire rack and sheet pan help with two things: dry brining in the fridge, and resting without trapping steam under the steak. If your grill struggles to hold heat, a cast iron press or cast iron griddle insert can help by storing heat and improving contact.
Skip forks. Punctures leak juice and make sticking worse.
For a broader electric-specific workflow, this electric grill steak walkthrough covers the same principle you’re chasing here: control heat, then control timing.
Oil and seasoning choices that do not burn
Use a high smoke point oil. Avocado oil and grapeseed oil are solid picks for searing because they hold up better at higher heat (often around 450°F-plus). Extra virgin olive oil can smoke earlier, especially on a small indoor grill where smoke has nowhere to hide.
For seasoning, keep it simple:
- Salt and pepper do the heavy lifting.
- Garlic powder is fine.
- Save butter and fresh herbs for after the sear, since they scorch fast on electric elements.
Prep the meat the pro way: dry brine, dry surface, smart timing
Most people try to fix searing with more heat. You’ll get better results by fixing your prep first.
Dry brining improves flavor, but it also helps crust. Meanwhile, drying the surface prevents steaming. Put those together and your electric grill finally gets a fair shot.
If you’ve been chasing better browning on a flat electric surface too, this 2026 guide on griddle sear tips makes the same point: contact plus dryness beats fancy tricks.
Dry brine for a better crust
Dry brining sounds fancy, but it’s just salting early. Salt pulls moisture out at first, then the meat reabsorbs it. As a result, the surface dries and the inside seasons more evenly.
Use one of these timing options:
- Best: salt the steak, put it on a rack, leave it uncovered in the fridge for 12 to 24 hours.
- Good: salt 45 to 60 minutes before cooking.
- Avoid: salting 5 minutes before grilling, since it often leaves wet spots.
Pat dry until it feels almost tacky, not damp
Right before the steak hits the grill, do the paper towel test. Keep blotting until the towels stop getting wet. If the steak came from a wet package, take the extra minute. That moisture is the crust you’re giving away.
Used a marinade? Wipe it off. Marinade sugars burn, and the liquid steams. Re-season lightly with salt and pepper and move on.
The pro cook: preheat, sear, then finish to the exact temp you want
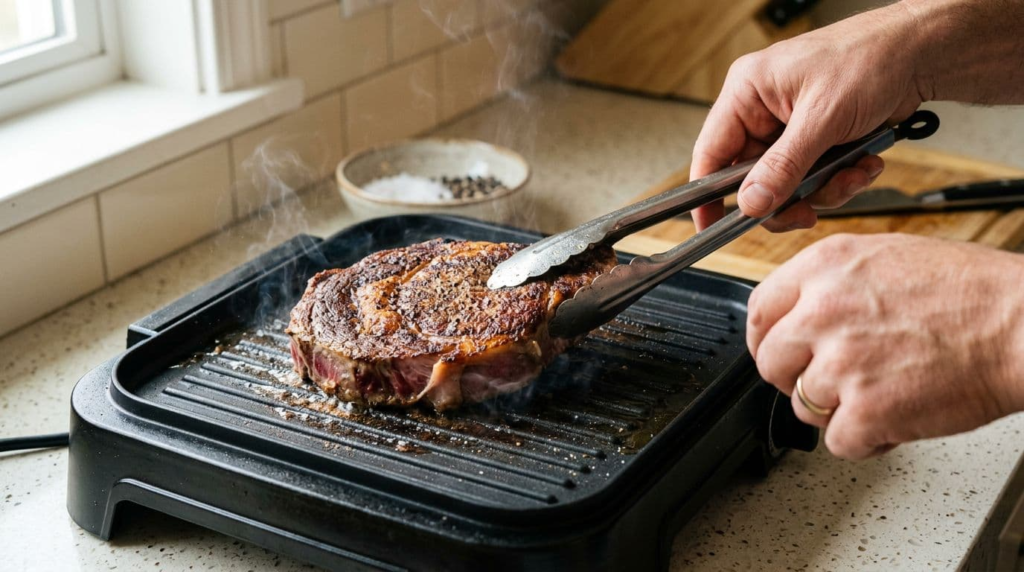
This is where electric grills reward discipline. You’re going to preheat longer, keep the lid down more, and sear with purpose.
For thicker steaks, reverse searing has become the go-to approach in 2026 because it solves the classic electric grill problem: outside done, inside still catching up. You warm the steak gently first, then hit it with a fast, hot sear at the end. If you want a full reverse-sear roadmap, Hey Grill Hey’s reverse-sear technique guide is a solid reference point.
Preheat like you mean it
Many electric grills need about 15 minutes on max to get the grates properly hot. Keep the lid closed so heat builds and stays there.
A few small moves make a big difference:
- Oil the steak lightly instead of spraying the grates (sprays can bake on and cause sticking later).
- Expect a heat dip when the meat lands, so don’t start with a “warm” preheat.
- If your grill has hot spots, learn them and use them on purpose.
The sear happens in the first two minutes. If the grate isn’t hot then, it won’t magically get better later.
Step-by-step: the Electric Sear technique
Use this sequence for most electric grills, especially contact-style or lidded indoor models:
- Place the steak down and listen for a loud sizzle. If it’s quiet, your grate isn’t ready.
- Don’t move it for 60 to 120 seconds. Movement tears the surface before it releases.
- Optional: rotate 45 degrees for crosshatch marks, then finish that side for another 30 to 60 seconds.
- Flip once, then move the steak to a fresh hot spot so you’re not searing on a cooled patch of grate.
- Sear the fat cap and edges with tongs for 30 to 60 seconds to render and crisp.
- Finish to temp. For thick steaks, lower heat or shift to a cooler zone if your grill supports it. For thin steaks, skip the long finish and focus on fast searing while watching the thermometer.
If you’re doing a reverse sear: cook the steak on lower heat first until it’s about 10 to 15°F below your target, then crank heat and sear 1 to 2 minutes per side.
Electric grill steak temp guide, plus resting and a simple finish
You don’t win steak night by guessing. You win by pulling at the right temp, then letting carryover heat finish the job.
Thickness changes timing a lot, so treat minutes as noise. Track temperature instead.
Electric grill steak temp chart
This is the electric grill steak temp reference you’ll use most often. Pull temps assume you’ll rest the steak before slicing.
| Doneness | Pull temp | Final temp (after rest) |
|---|---|---|
| Rare | 120°F | 125 to 130°F |
| Medium-rare | 130°F | 135°F |
| Medium | 140°F | 145°F |
| Medium-well | 150°F | 155°F |
The thicker the steak, the more carryover you’ll see. Also, if you sear hard at the end, expect a small jump.
Resting and basting without ruining the crust
A good rule is resting about 30 to 40 percent of total cook time. Still, you don’t need math to get this right. Rest 5 to 10 minutes for most steaks.
Put the steak on a rack over a pan, or at least on a warm plate. Tent loosely with foil, don’t wrap it tight, because trapped steam softens crust.
Want a simple finish? Add compound butter after cooking. Mix softened butter with garlic and rosemary, then dab it on the hot steak so it melts without burning. Electric grills scorch butter fast, so post-sear is the clean move.
Mistakes that wreck a sear, and quick fixes that save dinner
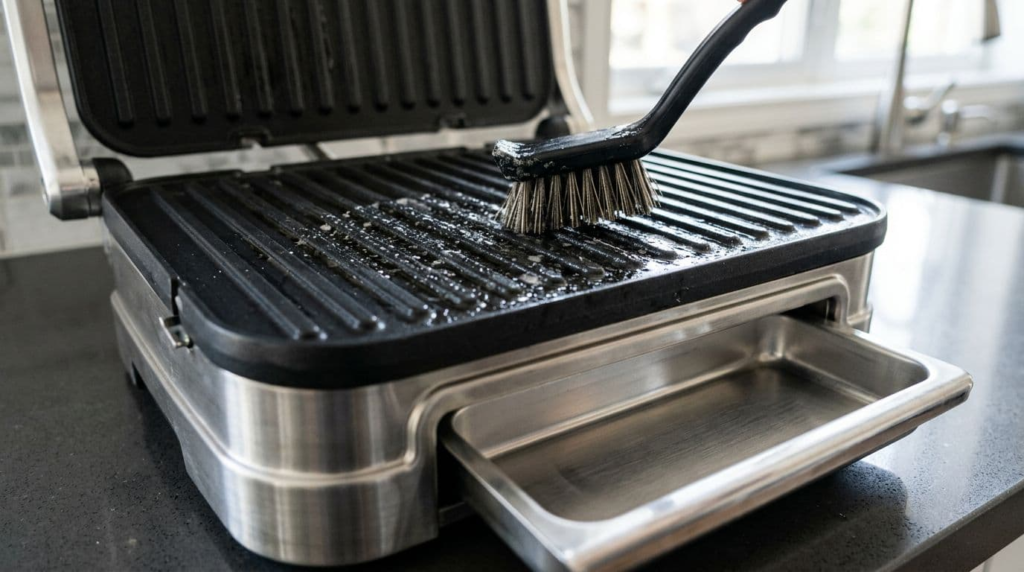
If you care about cleaning electric grills, you’re already thinking like a pro. A dirty grate insulates heat, increases sticking, and adds smoke from old grease. That’s three ways to ruin a sear.
Troubleshooting: no crust, sticking, smoke, or uneven browning
Here are the common failures, plus the fastest fixes:
- No crust: Your steak was wet, the preheat was short, or you flipped too much. Fix it by drying the steak harder, preheating longer, and leaving the steak alone for the first 60 to 120 seconds.
- Sticking: The grate wasn’t hot enough, you moved it too soon, or the grates were dirty. Fix it by waiting for a stronger sizzle and giving it time to release.
- Too much smoke: Your oil smoked, old grease burned, or sugary sauce hit the grate. Fix it by using avocado or grapeseed oil, cleaning the drip tray, and saucing after cooking.
- Uneven browning: Hot spots, a warped steak surface, or poor contact. Fix it by moving the steak to a fresh hot zone after flipping, or pressing lightly with a cast iron press.
Keep your electric grill ready for next time
Right after cooking, preheat the grill 3 to 5 minutes with the lid down. That loosens stuck bits so they lift off easier. Then brush or wipe the grates safely (let them cool if your model runs very hot).
Empty the drip tray every time. Also skip non-stick spray on the grates, because it can leave a sticky film that worsens sticking later. Before storing, make sure plates and trays are dry so you don’t trap odors.
Clean gear isn’t just neat. It gives you better heat contact and less smoke.
How to Sear Steak on an Electric Grill FAQ
Can you get grill marks on a flat electric griddle?
Yes, but marks are harder because the surface is flat. A ridged insert helps, and a weighted press can improve contact. Still, focus on overall crust first, because marks don’t always equal better flavor.
Why is my steak gray instead of brown?
It’s almost always surface moisture or weak preheat. Pat the steak dry, preheat longer with the lid down, and don’t crowd the grill. Also stop flipping early, because you’re dumping heat every time you lift the lid.
What is the best way to cook steak on indoor grill if it is thick?
Use a reverse sear style cook. Warm it on lower heat to about 10 to 15°F below target, then finish with a very hot sear for 1 to 2 minutes per side. You’ll get a better crust and more even pink inside.
Should you bring steak to room temp first?
A 20 to 30-minute sit can help it cook more evenly. However, dryness and real preheat matter more than “room temp.” Keep food safety in mind and don’t leave it out for long.
Do you close the lid on an electric grill when searing?
Usually, yes. Keeping the lid closed helps heat recovery, which electric grills need. Open it only when you flip, check temp, or sear edges.
Conclusion
Electric grills can sear steak, as long as you follow a simple formula. Get the surface dry, preheat until the grates are truly hot, keep the lid down so heat bounces back fast, and use a thermometer to nail doneness. Then rest before slicing so your crust stays crisp and your juices stay put.
Try it once with a thick steak and an overnight dry brine. After that, you’re not guessing anymore, you’re repeating a method.